Flower Border Pop-Up Page

Step 1: Cut out three journal pages using the journal page die from AJS Labels, Tags and More. Two should be from a patterned paper and one should be from the white cardstock. Cut out four full border flower pieces, using white cardstock, with the die from Border Flowers.

Step 2: Square up the ends of one of the patterned paper journal pages making it 9 inches in length. Then cut it into four equal pieces of 2-1/4 inches each. Fold the second patterned paper in half, creating your journal page.

Step 3: Select a border cutout from the Border Flower die set. There are two borders to choose from. I chose the curvier one versus the flatter one. Put the top of the die to the very edge of the paper.

Step 4: Once the edge of the four pieces has been cutout, use your scoreboard to score 1/4 of an inch on the opposite end of the border edge.
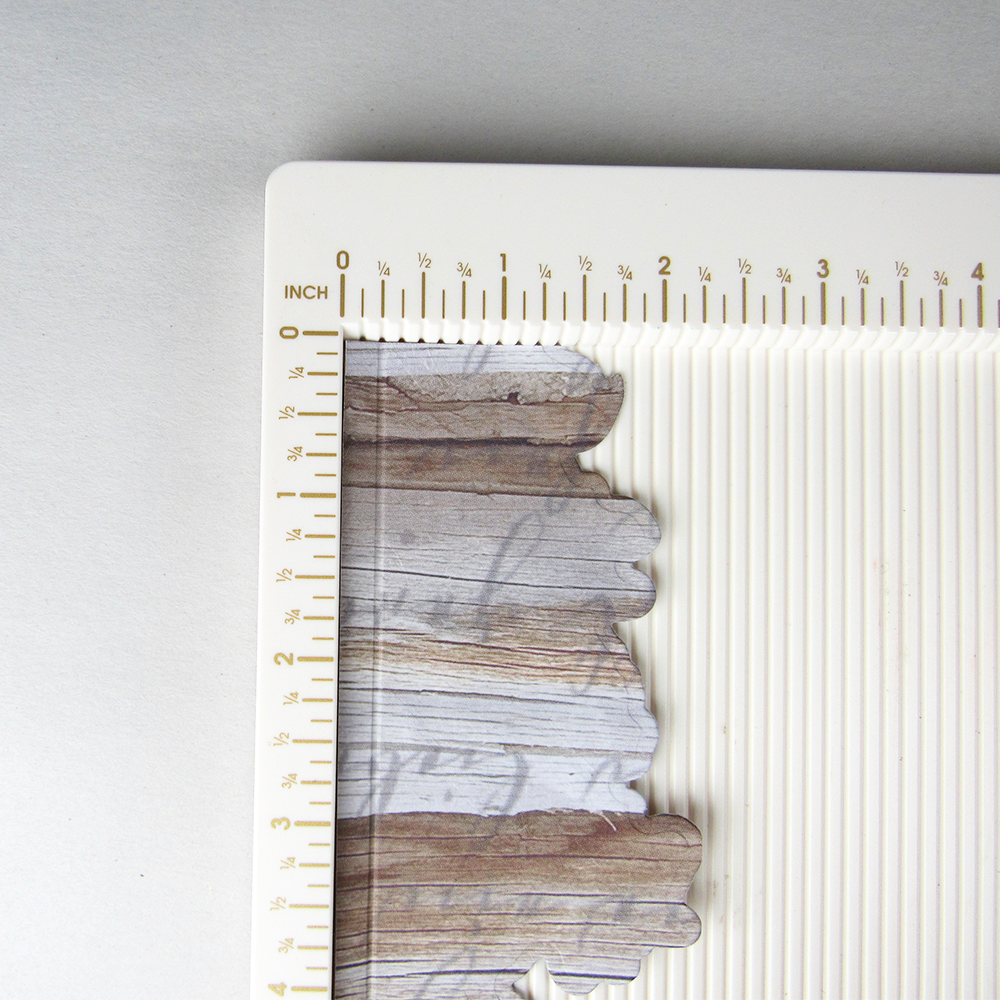
Step 5: Snip a little bit off each corner from the edge you just scored. This helps the paper lay flat when you attach them to your journal page.
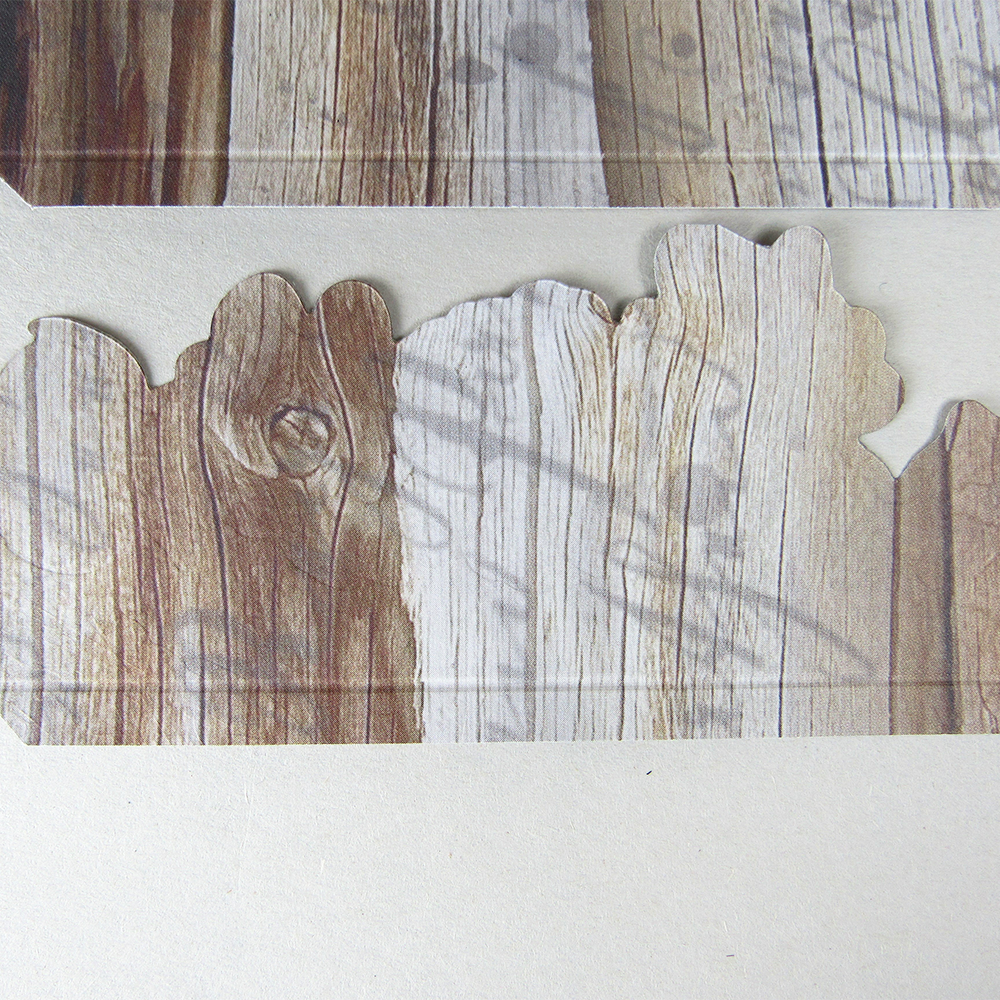
Step 6: Next fold each piece on the score line. Then, line the folded edge up with one of the sides of the folded journal page and glue it down. Do this for all four sides of your journal page. You can use double sided tape for this step, but I find glue gives you a little more wiggle room for adjustment.


Step 7: Next, add ink and/or color to the four floral border cutouts. Makes sure they are dry before continuing on to step 8.

Step 8: Using the coordinating flower border stamp, line up the stamp with the cutout, apply embossing ink and then embossing powder. Heat the embossing powder as per instructions.

Step 9: After embossing them, line the floral border edges with the flaps and glue them down. I find glue is better than tape for this step as they need to lay flat for folding.
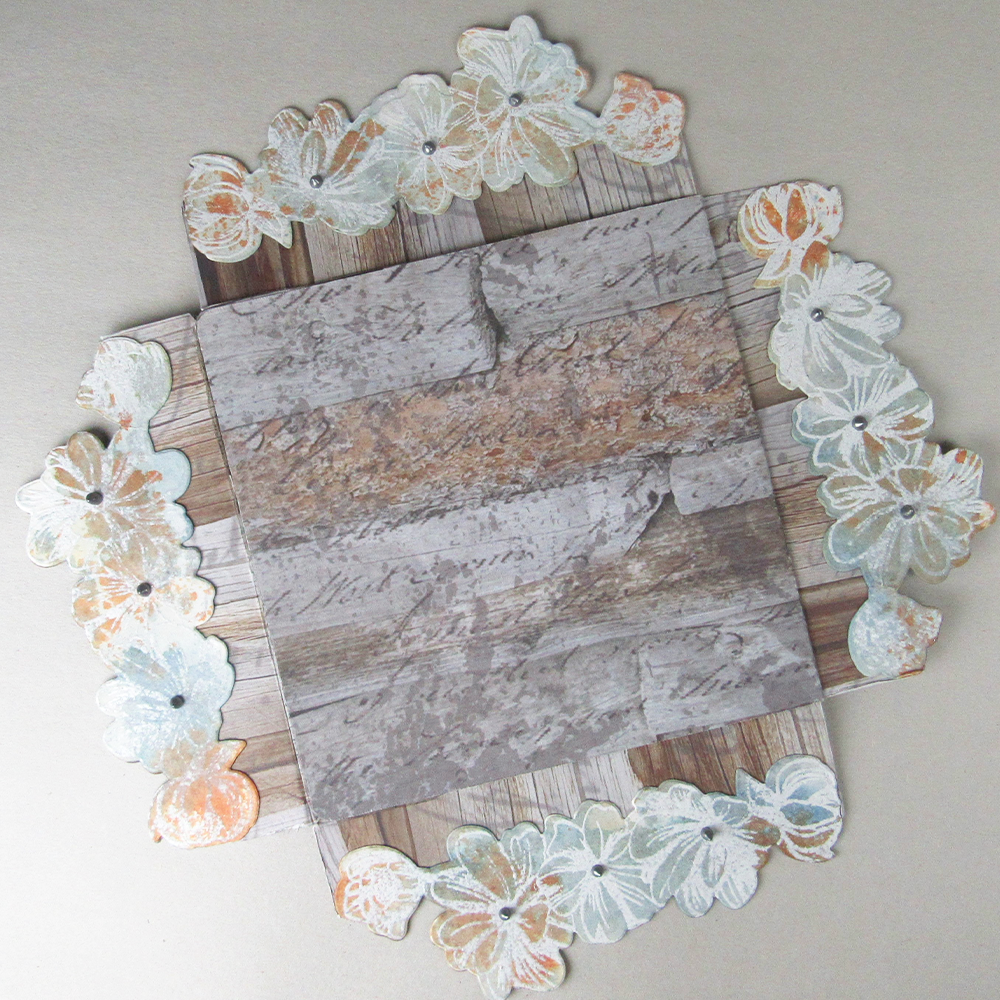
Step 10: Next, cut a square, approximately 4-3/4" x 4-3/4" and glue or tape it into the center where you attached the floral border edge flaps.

Step 11: Tuck each corner of the flap under the next.
You can decorate the center with inks etc, stamps, sentiments. The center can also just be a journaling page.

Elizabeth Craft Designs Products used: